Tuesday, February 22, 2011
Project Life Week 6
I ended up ordering a second Project Life kit for all my 2010 pictures. I spent most nights this week editing and uploading all our pictures from last year. I can't wait to put it all together, finish a couple layouts for 2009 (yes, totally behind on my scrapbooking) and then I will finally be caught up! I didn't think I would ever be able to say that, but I think by the end of March, I will be!
Linking to:
The Mom Creative
Monday, February 14, 2011
Project Life Week 5
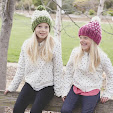
I am still loving this project. It is one of the best projects I've done. I love how I will remember little details that usually slip by because I'm not thinking about documenting the little things, and because I usually scrapbook it a year later. I love the daily pictures of the girls' clothes and hairstyles. I love that I am up to date, still having fun, and still looking foward to Monday nights when I get to put the week together.
Linking to:
The Mom Creative
Sunday, February 13, 2011
Rite Aid Coupon Shopping
2 Colgate Sensitive toothpastes ($3.50 each)
2 Dove Invisible Solid deoderants ($2.00 each)
1 Secret Clinical Strength ($7.99)
Total: $18.99 plus tax
Here are the coupons I used:
$4.00 off $20.00 purchase (Rite Aid video values coupon)
$2.00 off non-prescription purchase (Rite Aid video values coupon)
$1.00 off non-prescription purchase (Rite Aid video values coupon)
(2) $1.00 off Colgate Sensitive Toothpaste
(2) $2.00 off Dove deoderant
$1.00 off Secret Deoderant
Total after coupons (with tax): $4.16 and I got back $12 in +Up Rewards
I didn't have any +Up Rewards to use this time since I haven't done any coupon shopping lately, so my out of pocket was a little "expensive" for me, but I've got two more great transactions for next weekend that should be almost free. I'll let you know my plan later in the week if you are interested in doing some Rite Aid shopping.
Friday, February 11, 2011
Holiday Decoration
After a little steel wool and some primer, I painted it with a pewter color and hung some paper hearts. Madison loves it and I can easily hang something on it for all the upcoming holidays.
Thursday, February 3, 2011
Project Life - January
This has got to be one of the most fun projects I’ve ever done. It is easy and with hardly any effort, the pages end up looking so cute. Also, very easy to write down things I want to remember and stick them in the book right away.
At first, I had hoped to take at least a couple pictures every day. As I have already found out, that is just not going to happen. By the time we get home at night, we have just enough time to play with Sidney for a few minutes, make dinner, eat, sometimes squeeze in a bath, and get ready for bed. I carried my camera around all day yesterday, from room to room last night and didn’t take a single picture until 9:00 at night. So I’ve decided that if a great picture moment should arise during the week, then I’ll definitely be taking pictures, but mostly I’ll just be focusing on the weekends. That’s when we have time to relax and have the most fun.
Linking to:
The Mom Creative
Sunday, January 30, 2011
December Daily is Done!
Here are a few of my favorite pages from my December Daily:
I also got my Project Life in the mail yesterday! I was so excited I didn’t even change out of my cleaning clothes before I took a picture. Hopefully this project will help me to write things down, keep everything in one place and stay on top of my scrapbooking.
Friday, January 28, 2011
Blog Critique Party
Please take a look around my blog, check out the layout, pages, buttons, sidebar and gadgets. I would love for you to gently critique my blog. I’m hoping you will leave me some positive feedback about my blog. It would be great if you could give me constructive criticism but be sure to tell me what you like about my blog too! Do you like my pictures? Does my blog load quickly for you? How about the font? All tips and tidbits welcome!
Thursday, January 27, 2011
Scrapbooking with my Silhouette
A few months ago I got a new Silhouette machine for my anniversary. Since it was so close to the holidays, I didn’t really get a chance to use it. I pulled it out a few weeks ago and downloaded a few images from Donna Downey. It is so fun. Pretty much anything you can think of is in the Silhouette store. Kind of like iTunes. You search from their online database and save it to your library.
Every few months I get focused on one craft and that is all I seem to want to do. Right now it is obviously scrapbooking. I know in a few months it will be knitting again, and then when the weather gets warmer it will be refinishing all the furniture I’ve stashed in the garage. For now, I’m happy to be making a dent in all the pictures I’ve got laying around.
Thursday, January 20, 2011
Two Year Scarf
Then I got pregnant, the morning sickness kicked in and I had no desire to do anything crafty. By the time I was ready to start knitting again, I was too big to do it comfortably. So it sat in my closet. After Sidney was born, I thought I’d have plenty of time to finish my scarf while she was napping. Then I went back to work early, so it sat some more. I finally picked it up again this fall determined to finish it while it was still cold.
I’m so happy with the way it turned out. It’s soft, light and very warm. You can never have too many scarves and I can’t wait until I start the next one.
Linking to:
Somewhat Simple, House of Hepworths, Today's Creative Blog, My Backyard Eden
Someday Crafts, Blue Cricket Design, Fireflies and Jellybeans, The Shabby Nest
Decor Mamma, Tidy Mom, Fingerprints on the Fridge, Kojo Designs, Plums Life
Fumky Junk, A Little Lovely, Be Different Act Normal, Tatertots and Jello
Thursday, January 13, 2011
Runner's World Article
Runner's World did a great job with the article and it gets me all teary eyed every time I read it.
Sunday, January 9, 2011
Rose Wreath Tutorial
Thank you for all your wonderful comments about this wreath. It is a bit time consuming, but totally worth it.
Supplies:
12 inch foam wreath
Cardstock – I used 8.5 x 11
scissors
hot glue gun
spray adhesive
glitter – I like Martha Stewart’s crystal fine glitter
1 1/2 yards sheer ribbon
1. I made two different sized circles. For the large circles, cut the cardstock into four pieces.
2. Cut each square into a circle. Doesn’t have to be perfect. Mine were ovalish, they both work.
3. For the smaller circles, cut your cardstock into strips about 3 inches wide. Then cut each strip into three squares. Cut each square into a circle.
4. Cut each circle into a spiral, trying to keep the thickness even throughout. Mine definitely were not even, but it is helpful.
5. Once all the spirals are cut, start rolling the flower starting with the outside. Roll as tight as possible keeping the bottom edge aligned at all times.
6. When it is completely rolled, pinch the flower together a little bit to help it hold it’s shape.
7. When you let go of your flower, it will spring open into shape.
8. Put a group of your flowers together on a sheet of newspaper and spray lightly with the spray adhesive. Then sprinkle your glitter on top. I was pretty generous with my glitter. Let dry at least 1/2 hour.
9. Hot glue the flower together by placing a little bit of glue on the bottom flap and then hold the flower in the shape you want while the glue dries. I found that if I left the individual flowers unglued, they would start to unwind and lose some of their shape after a few days.
10. Start gluing the large and small flowers on your foam wreath so that they are touching and showing as little of the foam as possible. You will probably have some little bits of the foam peeking through where you couldn’t fit even the little flowers. Continue with all your flowers and come back to that at the end. Once all the flowers are in place you can go back and cover some of the areas where a lot of the foam is showing. I took a left over glittered flower, pulled out a little bit of the middle, and tore it off from the rest of the paper.
11. I curled it as tight as I could and stuck it into the little holes in my wreath. If I needed more, I kept taking little bits from the left over flowers and wound them into little pieces.
12. I bought one and a half yards of sheer ribbon and wrapped it through the wreath and tied a bow at the top.
Email me if you have any questions and please send me a link with your wreath. I would love to see how it turns out!
Linking to:
Nesting Place